- October 11th, 2018, 6:15 pm#4909837
Hey guys. I've been building replica props as a hobby for a few years but never got around to any GB props. It's time to remedy that. The spirit goggles seemed like a cheep place to start. Hopefully I can make them look like a movie prop and less like a toy. 100% accuracy isn't an option so I'm going for more of "in the spirit" of the original prop.
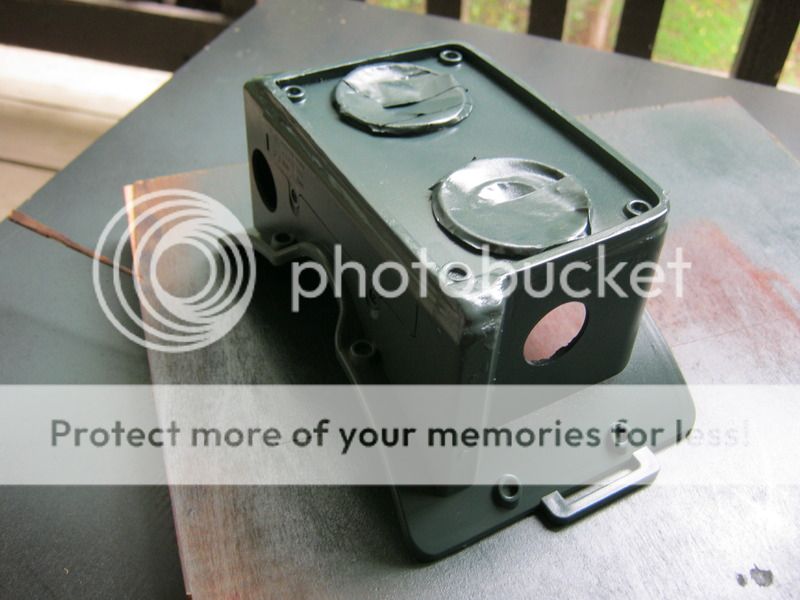
First, disassembly
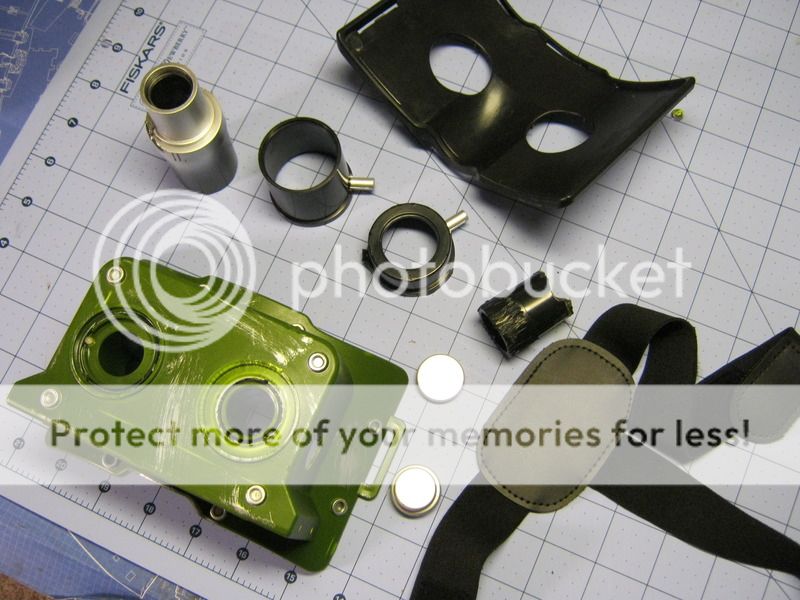
I put it in the freezer for about an hour to make the glue brittle. I was a little rough on the lenses since I wasn't planing to reuse them.
Next was to improve the shape of the main body,
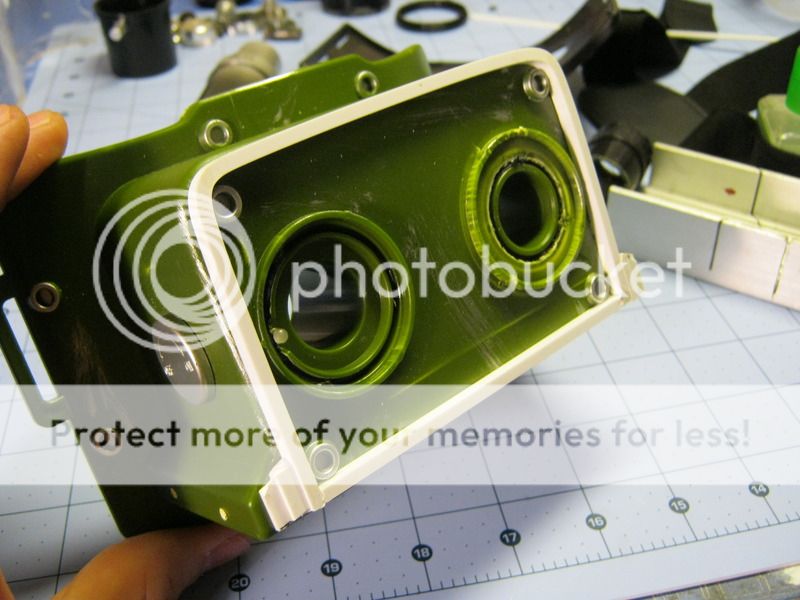
I used some modeling styrene that I bent to shape with a hair dryer
then putty and sanding
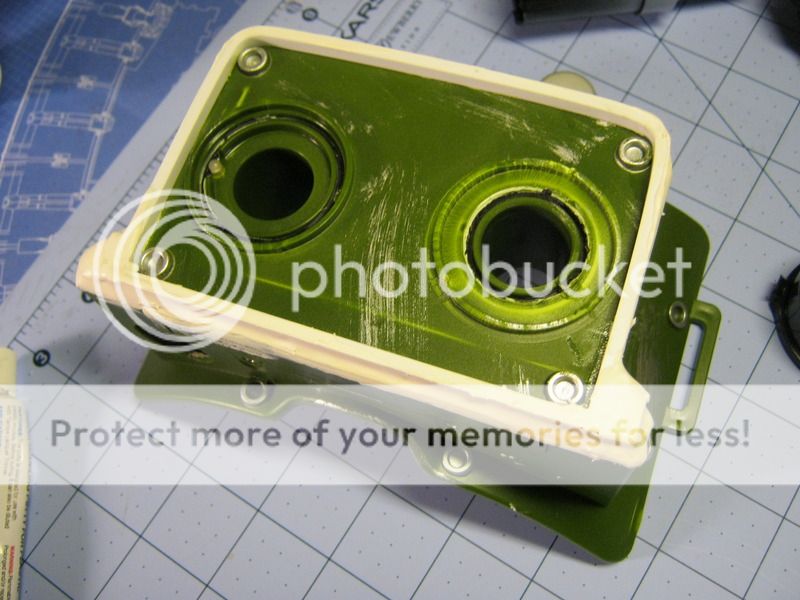
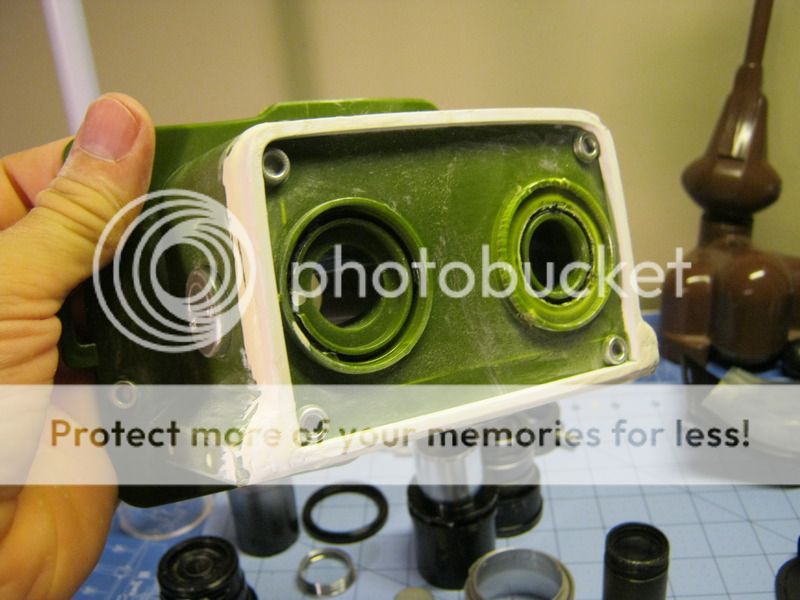
then the first layer of spray paint...which reveled more imperfections, so more putty and sanding
I decided to leave some of the imperfections because (1) I'm lazy (2) it would help with the weathered look I wanted, and (3) I'm lazy.
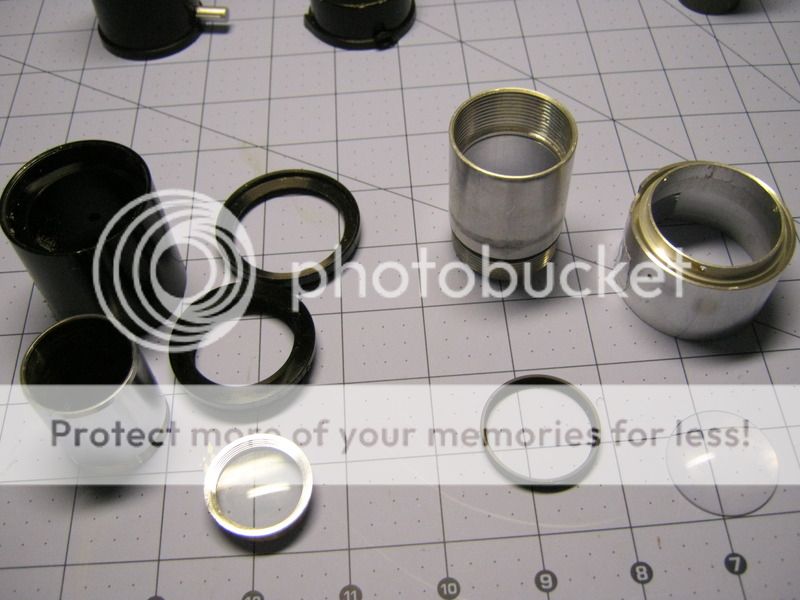
OK, now the really fun part, the lenses. I pulled out my big box of random parts (every prop maker needs a big box of random parts) and with some disassembled camera lenses and aluminum tubing like this:
I was able to knock these guys together:
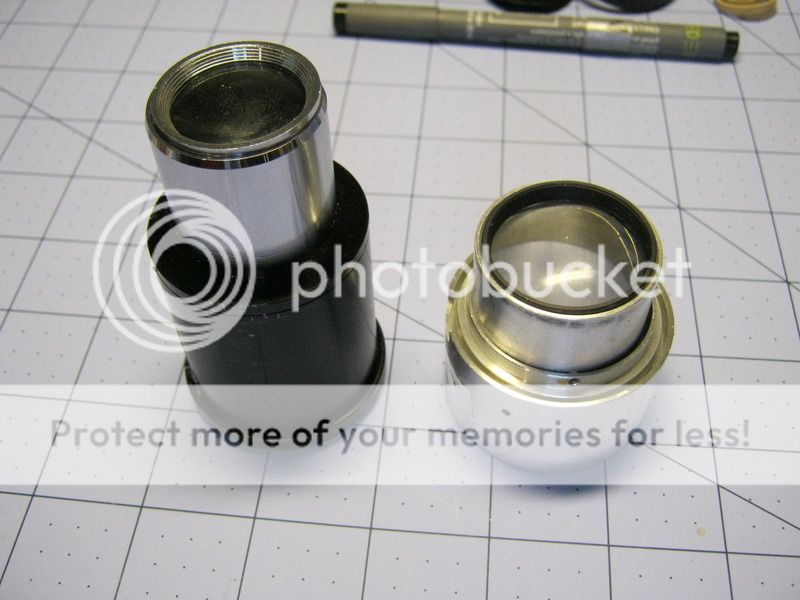
Again, not 100% accurate, but they have the right silhouette.
With help of my big jar of greeblies (it's a lot like the big box of random parts), I was able to find metal replacements for the knobs and things
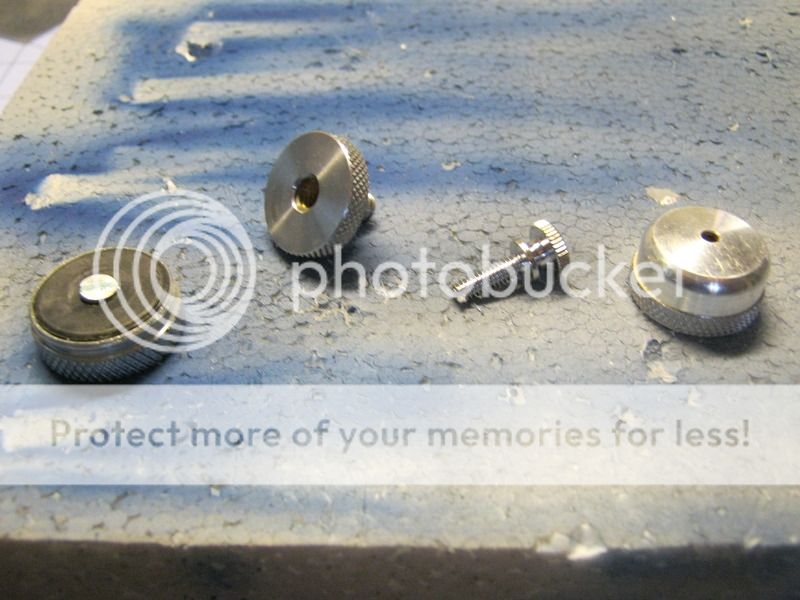
I painted the knobs with Model Master Metalizer Laquer: Gunmetal.
I also found some snap fasteners that I aged with Birdhwood Casey Super Blue. Then it was on to finale assembly and weathering....and i forgot to take photos of any of those steps
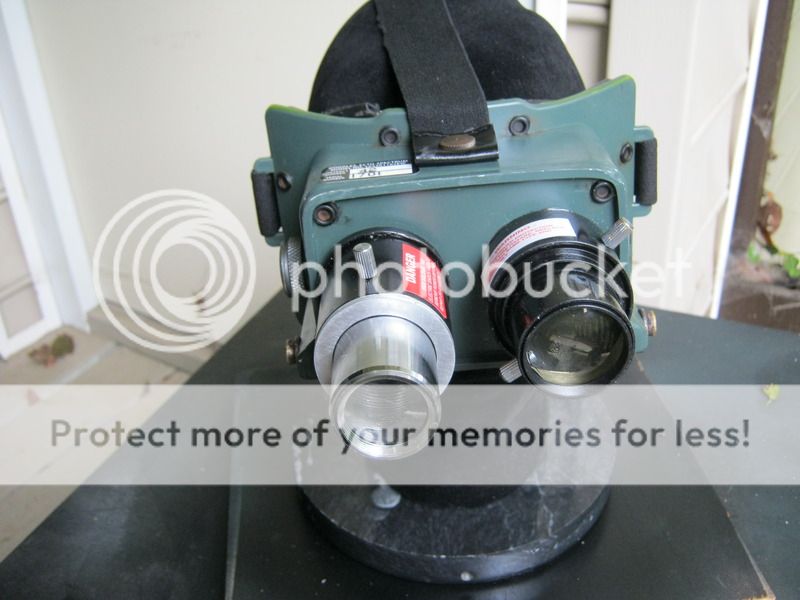
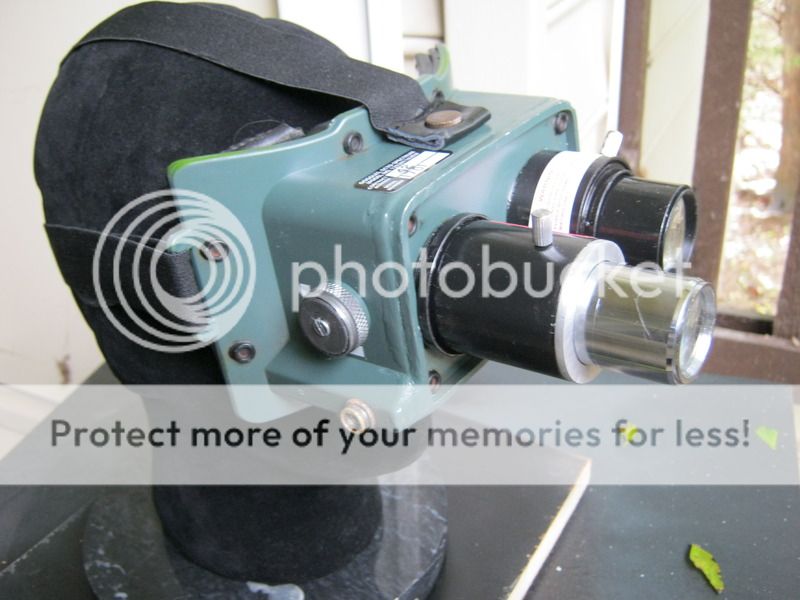
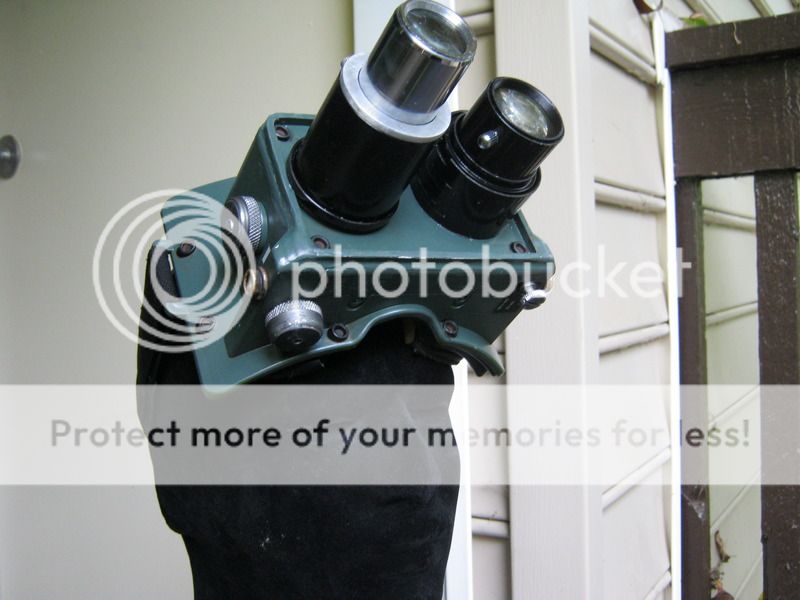
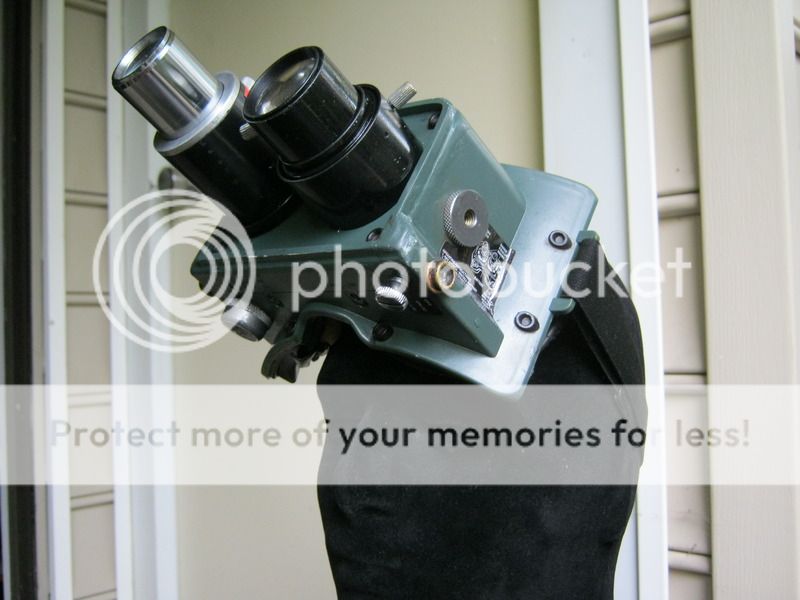
On to the finale product!

So, what do you think?
First, disassembly
I put it in the freezer for about an hour to make the glue brittle. I was a little rough on the lenses since I wasn't planing to reuse them.
Next was to improve the shape of the main body,
I used some modeling styrene that I bent to shape with a hair dryer
then putty and sanding
then the first layer of spray paint...which reveled more imperfections, so more putty and sanding
I decided to leave some of the imperfections because (1) I'm lazy (2) it would help with the weathered look I wanted, and (3) I'm lazy.
OK, now the really fun part, the lenses. I pulled out my big box of random parts (every prop maker needs a big box of random parts) and with some disassembled camera lenses and aluminum tubing like this:
I was able to knock these guys together:
Again, not 100% accurate, but they have the right silhouette.
With help of my big jar of greeblies (it's a lot like the big box of random parts), I was able to find metal replacements for the knobs and things
I painted the knobs with Model Master Metalizer Laquer: Gunmetal.
I also found some snap fasteners that I aged with Birdhwood Casey Super Blue. Then it was on to finale assembly and weathering....and i forgot to take photos of any of those steps
On to the finale product!
So, what do you think?


 - By GhostFaceX
 - By Kingpin
 - By timeware