This post may contain an affiliate link that helps support GBFans.com when you make a purchase at no additional cost to you.If you are using the code as is and not changing features you just copy the code over using the arduino development environment and then follow the diagram to connect everything
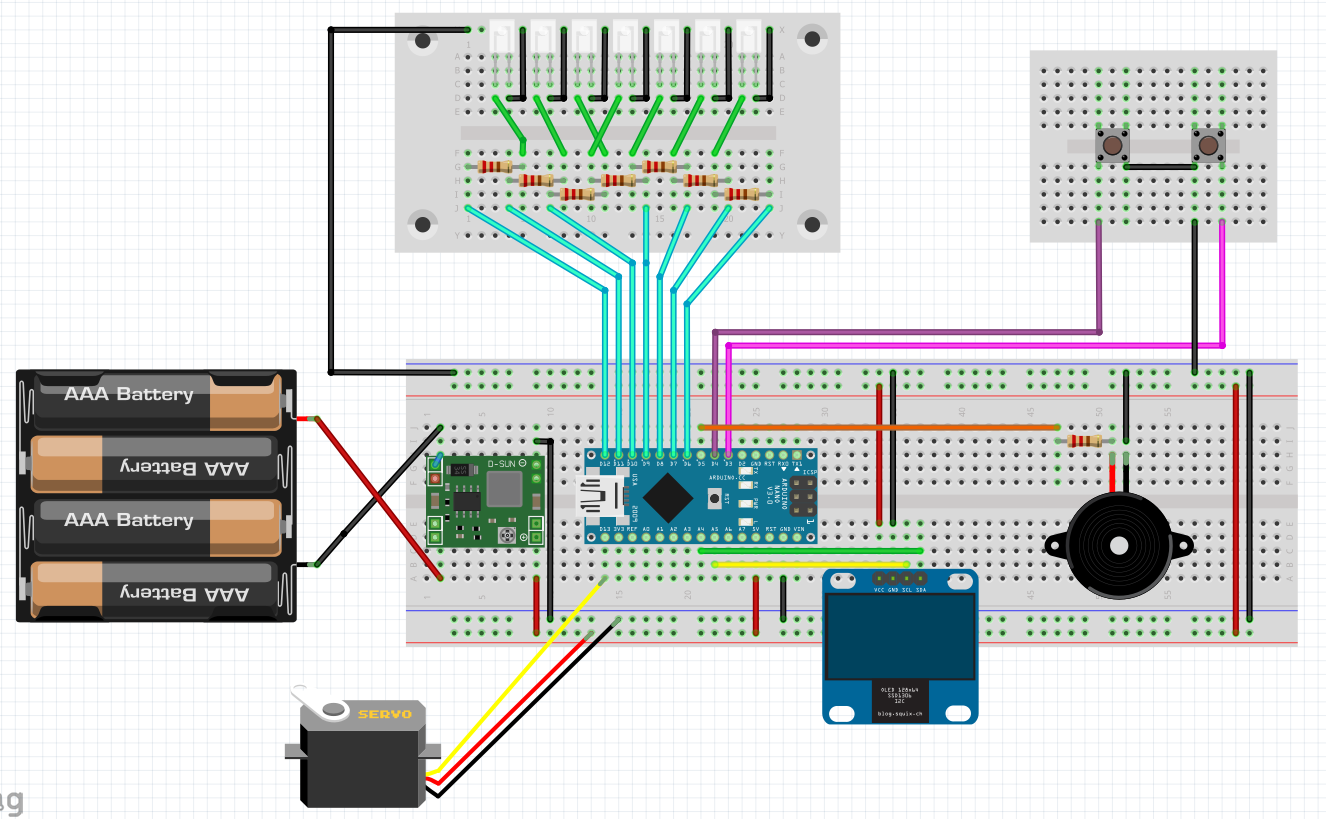
Arduinos are pretty simple devices and for a first project this one is not too bad. I tried to keep this project as simple as possible. If you were to hook up the breadboard exactly as shown and load the code it should work. Only notes of caution I would give are
1. you need to make sure the voltage from the buck converter is very close to 5 volts so you will need a multi meter for this project
2. Some of the newer screens available on amazon look the same but are not. They have custom libraries for display. I have not run into this but some other people have where the screen data is not showing properly. I think if you were to get one that has that issue there is a fork of the project on git the fixes it. Basically the newer screens have a different resolution even though they claim to be compatible.
3. Definitely recommend wire like this
https://www.amazon.com/gp/product/B01LH1G2IE cause the stuff I used was too stiff. I found this stuff after the build and all that buzzing you hear from the servo would be gone had I used this stuff.
If I was trying this for the first time I would definitely copy the breadboard setup and get it working like that before even attempting soldering and putting this into the 3d print.
I loved making this project. It was my first arduino project and I still get a kick out of it. I'm actually thinking of building another one and finishing it better. I've learned a lot about finishing 3d prints in the last 2 years and can make it much better now. Plus I made the resistor board much smaller and would probably also make one for the button board to get rid of the perf board which would clean things up a lot.


 - By pchrisbosh1
 - By tylergfoster