- February 20th, 2022, 2:23 pm#4967511
Could you provide a list of which components from the original electronic kit from Sean you replaced and what you replaced them with?


BrettRogersUK wrote: ↑March 7th, 2024, 10:46 am Hi,Hi Brett,
I'm embarking on a CD trap build and was looking where I could source all the parts from in the UK and come across your thread on here as you're from the UK too.
I see that you purchased the Mega pack from CD etsy shop which is something I may end up doing as well.
What printer did you print your trap on? I've got an Ender 3 v2 so was wondering if you printed yours on an ender 3 what orientation did you print the bottom plate in? When I load it into my slicer it comes right to the edge of the build plate. I wonder if you printed the full one or if you printed the cut one that's available in the thingiverse files.
Anyway, I want to congratulate you on your build. The end result is fantastic and it's threads like these that make me want to build this kind of thing.
Kindest Regards,
Brett
EctoLabs wrote: ↑March 7th, 2024, 11:33 am Hi Brett,Hi Dave,
I used an Ender 3 Pro which has the same build plate size as the v2. I also use Cura as my slicing software - the key with the bottom plate is to set your Build Plate Adhesion setting to 'None' as the software will try and add a skirt or brim by default which requires extra space around the model. Turning this off means you can use the entire width of the plate which is just enough for this part.
Hope that helps,
Dave
EctoLabs wrote: ↑June 5th, 2020, 6:32 am Aaaaand we're back with the next fun-packed episode of Rinsing Through Your Furlough Like A Boss...Hi, I'm using Neopixel Jewels in my build, much the same as yours but without the white led. Still works the same from the same neopixel library etc. What size screw do I need to be able to attach them to your mounts. I have printed 3 of them just need to fix the neopixels to the mounts.
All the parts are now nicely painted, so it's time to move on to the guts of the trap. I downloaded Sean's Electro-Mechanics's guide PDF from his Etsy store which is based around a shopping list of additional electronics not included in his kit. For simplicity's sake, I went with almost all of these recommended components with the exception of the main lighting. I'm mainly using Adafruit stuff here which in the UK can be ordered from Mouser.com - they ship from their warehouse in the US, but still manage to deliver (for free) in only 3 days.
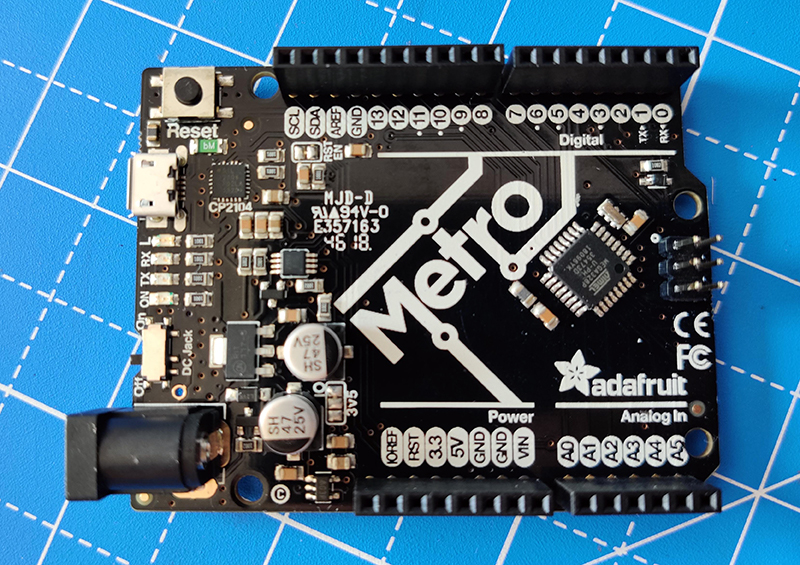
The main microcontroller is the Metro - Adafruit's Arduino Uno clone:
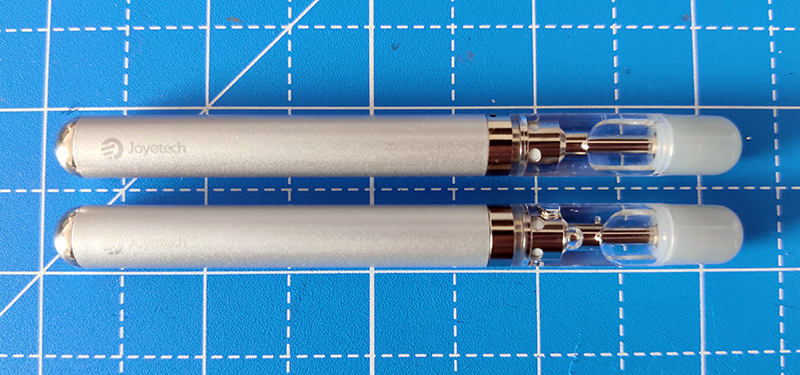
For the smoke, I'm using 2x Joyetech eRoll Mac eCigs with a vape mixture of 80% vegetable glycerine, 20% deionised water:
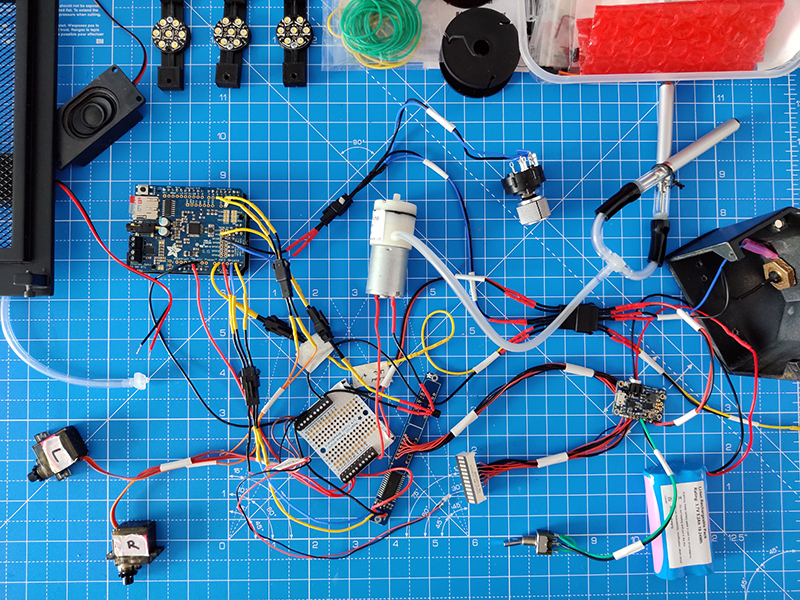
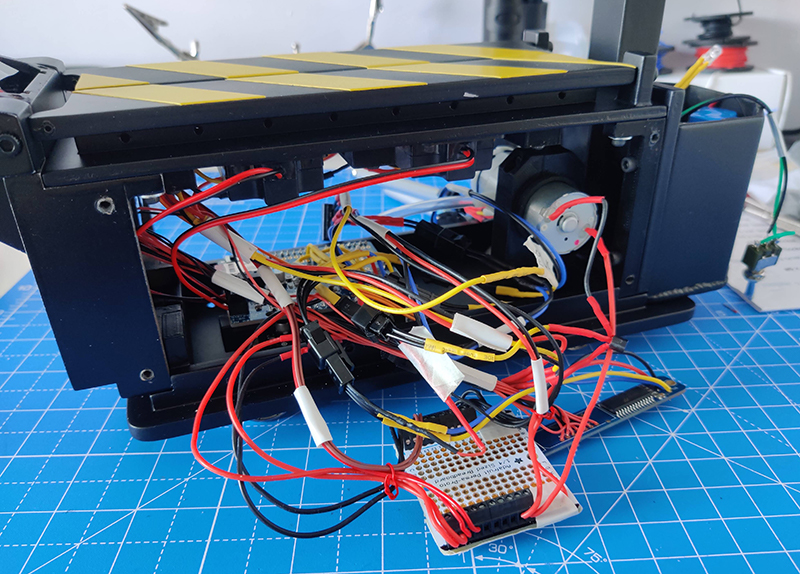
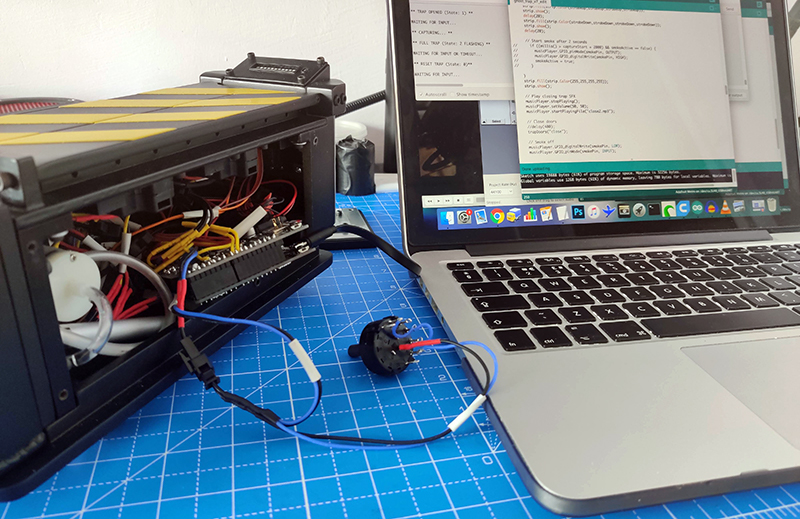
Wiring everything together was straightforward but took a while, eventually producing a mess of multicoloured wires. Along with the kit items, I'm using the Adafruit Music Maker Shield for SFX playback, 2x Adafruit 3W Enclosed Speakers, Adafruit Bi-Color Bargraph (can display red, green and yellow), RS Li-Ion Battery (3.7V, 5.2Ah) and an Adafruit PowerBoost 1000 Charger (which converts the 3.7V battery power into a 5V circuit and also makes it easy to recharge the battery via micro USB):
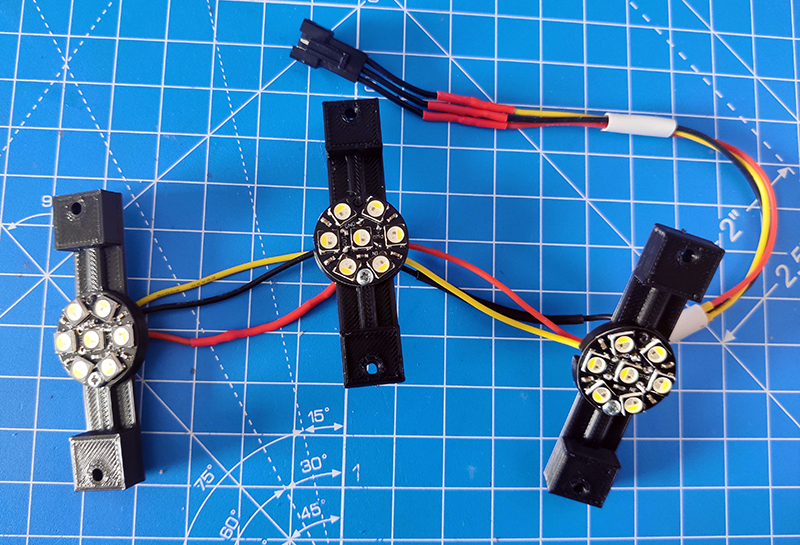
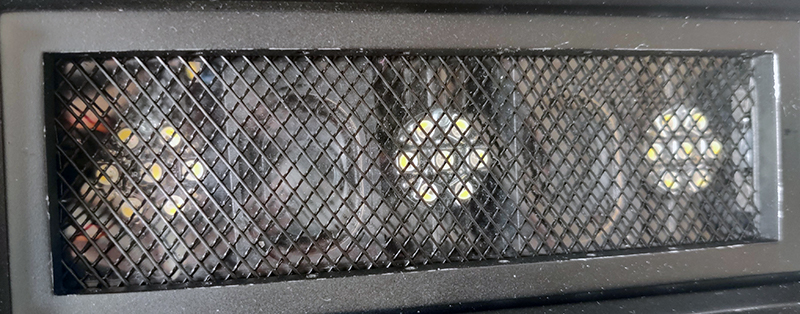
The main lighting effects are where I deviated slightly. Instead of using three individual white LEDs and a lighting gel, I opted to use 3x NeoPixel Jewels. These are roughly the same size as the white lights that Sean used, only each Jewel contains seven 5mm NeoPixels - and each NeoPixel contains one red, one green, one blue and one 6000K cool white LED. This gives us a total of 21 pixels that can be controlled individually for lots of cool effects and pretty colours. They are also really bright which is great for the blinding effects of accidentally looking into the trap.
The great thing about the Jewels is that they can be linked together in a chain, so we only need to use one data pin on the Arduino. I created this chain with a 3-pin JST connector - the data wire connects to a digital PWM pin on the Arduino board, and also has a 470 Ohm resistor soldered inline near the first Jewel which protects the first pixel in the chain.
I also needed to modify the design of the LED mount to fit the Jewels. With my design the soldered wires can be fed into the centre of the mount and only needs a single small screw to secure in place. If anyone would like the STL for this, you can grab it from here: https://www.thingiverse.com/thing:4426034
Right, let's finally start putting this all together. The LED mounts are attached to the top section in between the speakers. As I am not using the supplied lighting gel, I cut a strip from a clear plastic document wallet instead which is sandwiched between the lighting and speaker assembly and the mesh from the kit. Leaving the plastic out completely creates a cleaner look, but I figured it would be wise to have a barrier between the smoke holes and the electronics so vape residue (which is horribly sticky from the glycerine) cannot settle on them over time:
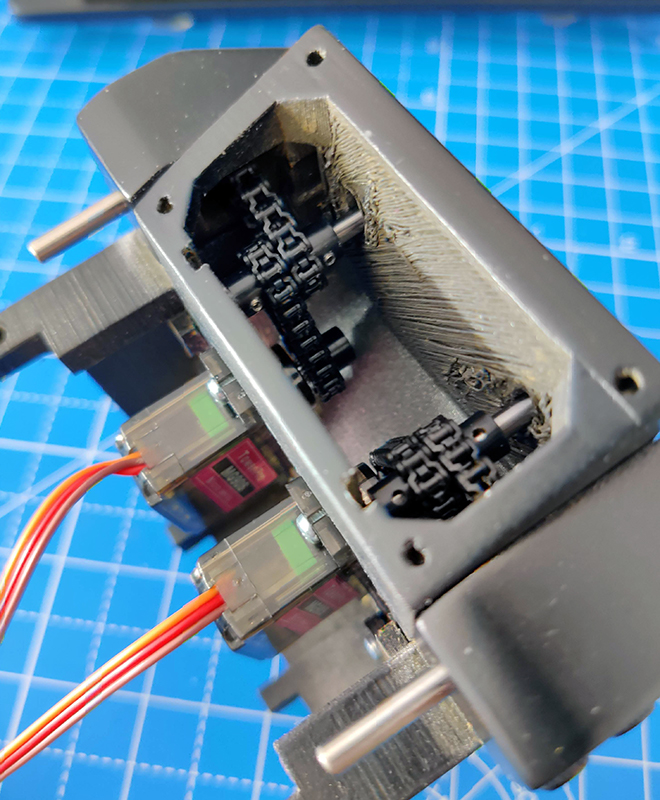
Then, I focused on the door mechanism which is, quite frankly a work of genius. Working out a way of fitting two servo motors and a chain system as well as the bargraph and separate LED into such a small and irregularly shaped area is no mean feat, but this really works incredibly well. Fitting the small plastic chains around the axels was extremely fiddly as there's not much room for manoeuvre and the links can easy unclip themselves. A number of attempts and many unrepeatable expletives later...
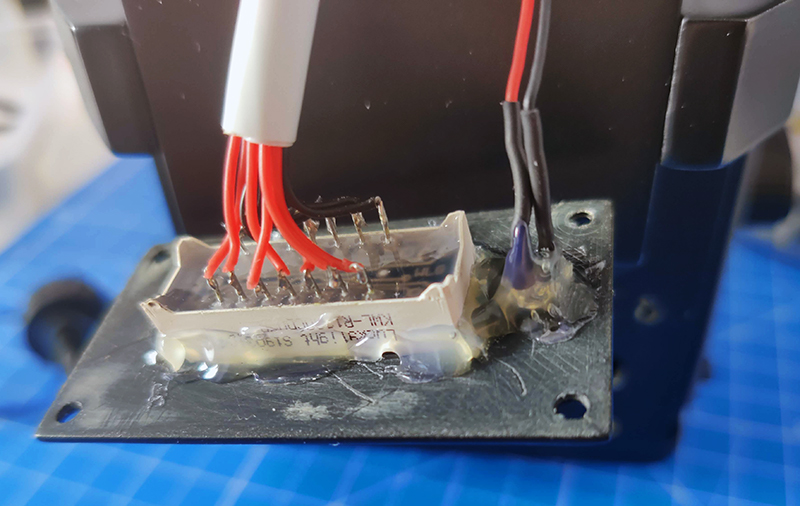
Even with all that packed into the front section of the trap, there's still just enough room for the 16 (count them!) wires attached to the bargraph and yellow LED. I sanded the underside of the bargraph plate and used a load of hot melt glue to keep everything in place:
Next, I assembled the rest of the main body until all electronic components were in place, leaving off just the side panels. The doors slide into place easily, but as Cristoval pointed out in his build, it is easy to split the ends of the door panels if the threads are not carefully pre-threaded. The two socket screws at the rear ends went in fine, but I still managed to crack the plastic on one of them when inserting the mini set screws that tighten against the metal axels (I should have dug out some of the plastic in advance). I repaired this with some super glue and used set screws on both sides of each door to secure.
I'm not gonna lie - as a bit of a neat freak when it comes to cabling, this rats nest is making me rather anxious. Nevertheless, it's all starting to look like a proper ghost trap... albeit a disemboweled one:
Now it's time for the re-programming. As I mentioned in the first post, I want to edit the code to make the trap behave and sound a little more like the Sedgewick trap from GB1. With Jeremy Williams' original code, the first stomp on the pedal opens the doors and produces smoke, flashing lights and sound all at the same time. The second stomp closes the doors immediately, illuminates the bargraph and starts the red light blink and beeping. The SFX are also taken from the Video Game files that were released a few years ago and don't sound much like the movie so I want to try and recreate the sound where possible. I want something more accurate, namely:
* STARTUP WHEN SWITCH IS FLICKED ON - Need to improvise on this one, but want to replace the default sine tone with a cooler sound effect)
* FIRST PEDAL STOMP - Doors open with pinkish white light and door opening sound effect. The trap should be still and relatively quiet in its open position until the second pedal stomp as it is in GB1.
* SECOND PEDAL STOMP - Lights and sound intensify and capture sequence begins, mimicking sucking a ghost into the trap => Doors close once capture is complete => A few seconds of silence => Bargraph illuminates with an accurate sound effect => Red light blinks with more accurate beep => Blue electrical spark effect to mimic Venkman's nudge => Smoke begins to pour out of the trap.
...not too much to ask for right?
Let's get it jacked up to the computer and give it some balls! Find out how I do next time...
TTFN x
For sure. I think seeing ordinary guys like the Gh[…]
 - By Indy Magnoli
You can see our Paranormal Boots in action here: […]
The opening post contain a lot information. Quick […]


 - By kahuna900
 - By UncannyGirl